 Save to Pinterest
 My kitchen smelled like a British summer the afternoon I first made black currant jam, though it was actually November and raining outside. A friend had brought over a punnet of the most gorgeous dark berries from a farmer's market, their skins so deep they were almost black, and challenged me to do something with them before they went soft. I'd never made jam before—it felt intimidating, all that boiling and testing for the perfect set—but something about those berries demanded to be preserved rather than eaten fresh. Two hours later, I had four jars of the most jewel-like preserve sitting on my kitchen counter, and I realized I'd been hooked on jam-making ever since.
I made this jam again last summer for a dinner party where the theme was "things I grew or made myself," which sounds pretentious but was actually just an excuse for everyone to show off in their kitchens. When I brought out those jars with handwritten labels and a spoon so people could taste it straight from the jar, one of my guests—a notoriously picky eater—went completely quiet, took another spoonful, and asked if I could teach her how to make it. There's something about homemade jam that feels like a small gift wrapped in glass, and watching her face light up reminded me why I bother with the whole process.
Ingredients
- Fresh blackcurrants (1 kg): These little dark berries are packed with natural pectin, which is what helps your jam set, so don't skip this ingredient for anything else—they're essential and honestly, if you can't find fresh ones, frozen work beautifully too.
- Granulated sugar (900 g): Use regular white sugar for the clearest jam; the ratio of 900g to 1kg fruit is what jam-makers call the "60% method" and it gives you that perfect balance of sweetness without being cloying.
- Fresh lemon juice (2 tbsp): This is your secret weapon—it brightens the dark, rich flavor of the currants and actually helps the jam set by adding acid, so don't be tempted to skip it even though the amount seems small.
Tired of Takeout? 🥡
Get 10 meals you can make faster than delivery arrives. Seriously.
One email. No spam. Unsubscribe anytime.
Instructions
- Chill your testing plate:
- Pop a small ceramic plate into the freezer right at the start so it's ice-cold when you need it later—this is how you'll know when your jam has reached setting point, and a cold plate makes all the difference.
- Prepare and crush the berries:
- In your large saucepan, combine the cleaned blackcurrants and lemon juice, then gently crush some (not all) of the berries with a potato masher to release their juice without turning everything into a pulp. You want some texture, so leave plenty of whole berries.
- Macerate with sugar:
- Stir in the sugar until everything is coated, then let the whole mixture sit undisturbed for 10 minutes—you'll see liquid pooling at the bottom as the berries release their juice, and this is exactly what you want.
- Dissolve and heat gently:
- Place the saucepan over medium heat and stir constantly until every granule of sugar has dissolved and you don't feel any grit against the wooden spoon. This takes patience, but rushing it can cause crystallization later.
- Bring to a rolling boil:
- Turn the heat up to high and let the mixture bubble vigorously, stirring frequently to prevent sticking on the bottom—you're looking for that rapid, energetic boil where the bubbles look almost angry.
- Boil and skim:
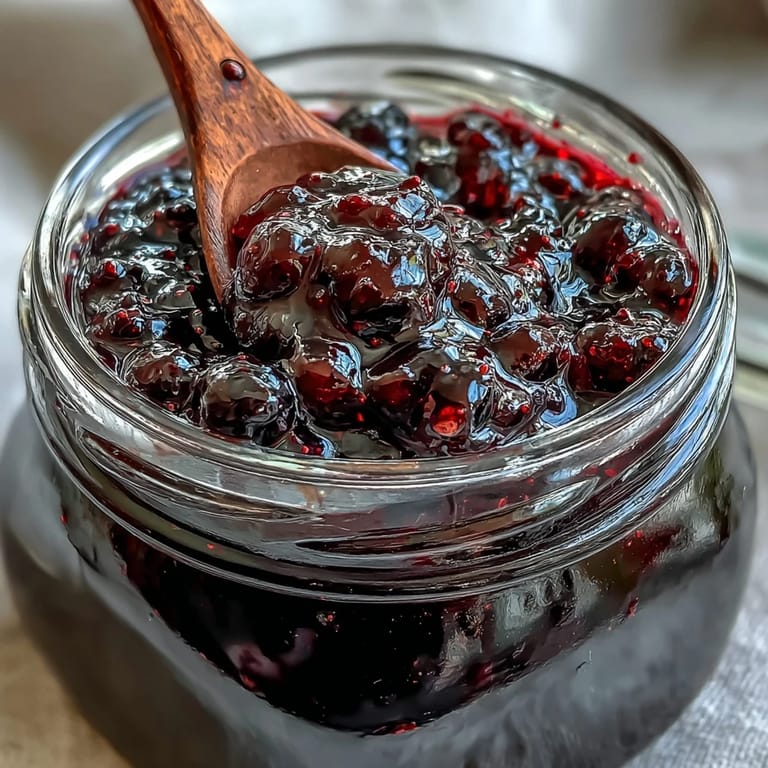
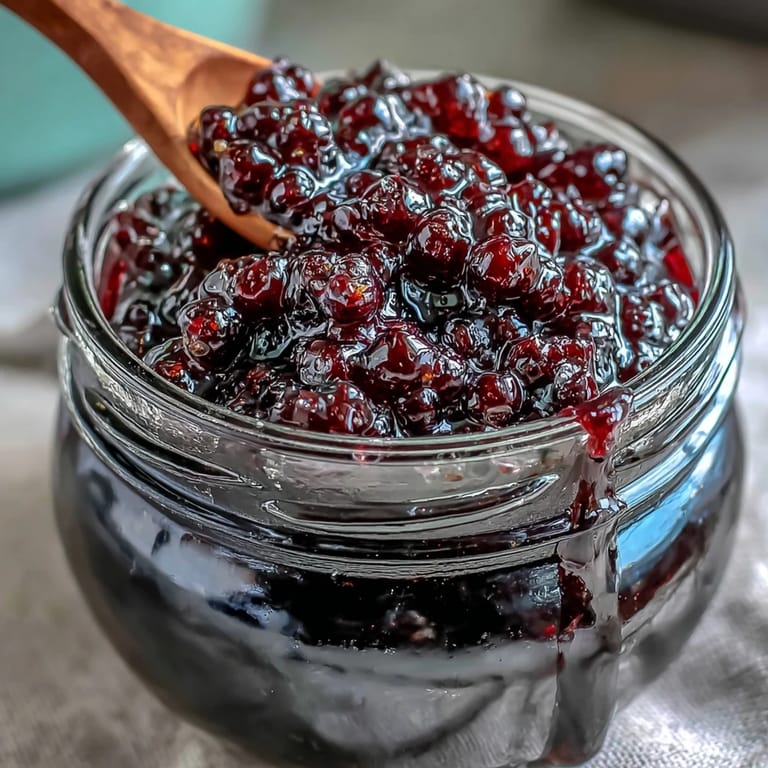
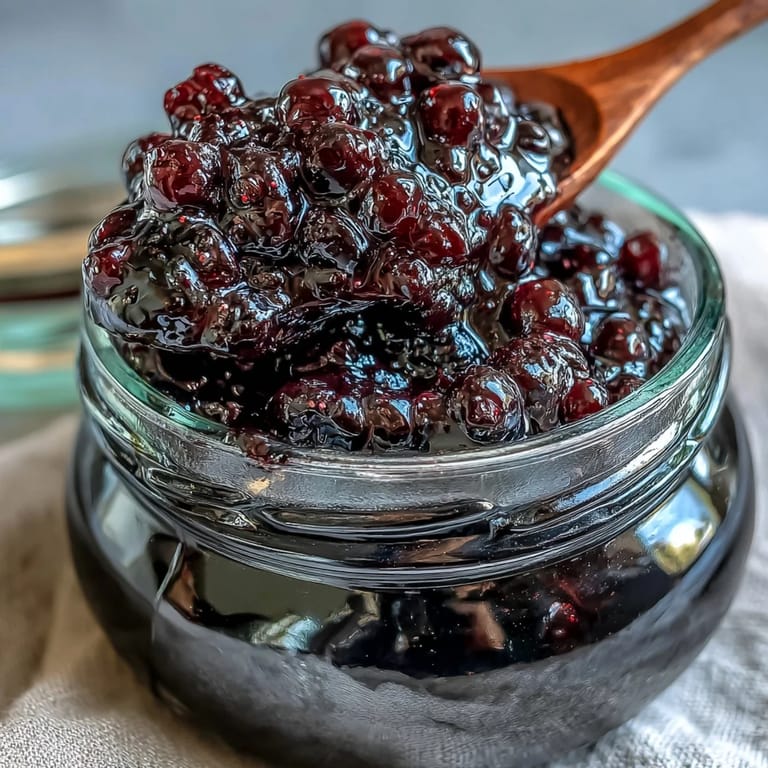
- Let it boil hard for 10 to 15 minutes, skimming off any white or grey foam that rises to the surface with a spoon (this is just impurities, and removing it gives you a clearer, more beautiful jam). Watch the color deepen from dark purple to an almost black-wine shade.
- Test for setting point:
- Drop a small spoonful of jam onto your frozen plate, wait one minute, then push it gently with your finger—if it wrinkles and doesn't run back together, it's ready; if it's still too runny, boil for another minute and test again.
- Rest and settle:
- Once it's set, remove the pan from heat and let it sit for 5 minutes while you stir occasionally—this helps distribute the fruit evenly so you don't end up with all the berries floating at the top of one jar.
- Jar and seal:
- Using a ladle, carefully pour the hot jam into sterilized jars, leaving about half a centimeter of headspace at the top, then seal immediately so the heat creates a natural seal as it cools. The jam will continue to thicken slightly as it cools, which is perfect.
- Cool and store:
- Let the jars cool completely at room temperature—you'll hear a satisfying little pop as each jar seals—then label them with the date and store in a cool, dark cupboard where they'll keep for about a year.
 Save to Pinterest
 The moment I understood jam-making was when a batch didn't set properly—I'd been chatting on the phone and missed the setting point, and ended up with something more like blackcurrant syrup. Instead of throwing it out, I served it warm over vanilla ice cream at a dinner, and it was actually better than the properly set jam because it melted into rivers of deep fruit flavor. That failure taught me that there's rarely a true disaster in cooking, just unexpected outcomes.
Variations Worth Trying
Once you've made the basic version a few times and feel confident with the process, the world opens up for experimentation. I've added a split vanilla pod during cooking (which perfumes the whole kitchen and adds an unexpected floral note), stirred in a splash of cassis liqueur right before jarring for a boozy, sophisticated version, and even experimented with a 50-50 blend of blackcurrants and raspberries when I ran out of currants. Each variation changes the flavor profile just enough to keep things interesting without straying too far from what makes this jam special in the first place.
Texture and Consistency Choices
The texture of your finished jam really depends on how much you crush the berries at the beginning and whether you strain it afterward. If you prefer a smoother, more refined jam, you can press the cooked mixture through a fine sieve before jarring—this removes the skins and most of the seeds and gives you something almost silky, though you lose some of that rustic, textured appeal. I personally like mine with a bit of tooth to it, those little blackcurrant skins giving you something to bite into, but this is entirely down to your preference and what you plan to use it for.
When Jam Goes Beyond Toast
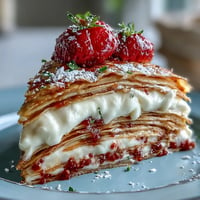
The real magic of homemade blackcurrant jam isn't just on toast or stirred into yogurt (though both are perfect), but in what it becomes once you start thinking creatively about where to use it. I've spooned it into the center of buttery shortbread biscuits, swirled it into cheesecake batter before baking, glazed a duck breast with it, folded it into whipped cream as a filling for layer cakes, and even used it as the base for a blackcurrant jam cocktail that somehow tastes both retro and completely modern. Once you have these jars in your pantry, they become a shortcut to impressive desserts and unexpected flavor combinations.
- A dollop on roasted pork or game birds adds a sharp, fruity counterpoint that feels restaurant-quality but requires zero extra effort.
- Swirled into plain Greek yogurt or soft cheese for instant fancy snacks that look intentional and taste like you planned them all along.
- Warmed gently and spooned over vanilla or Earl Grey ice cream for an elegant dessert that tastes complex but took you literally two minutes.
 Save to Pinterest
 There's something deeply satisfying about standing in front of a shelf of jars you've made yourself, each one a small achievement and a promise of future breakfasts. These blackcurrant preserves are the kind of thing that makes ordinary mornings feel a little bit special, and they're foolproof enough that anyone can make them beautifully.
Recipe FAQs
- → How can I tell when the jam has set properly?
Place a drop on a chilled plate and let it cool for a minute. If the surface wrinkles when pushed, the set is achieved.
- → Can I make the spread smoother?
Yes, by sieving cooked blackcurrants before adding sugar to remove skins and seeds.
- → What sweetener is used in this spread?
Granulated sugar is used to balance the tartness of blackcurrants.
- → Is this suitable for special diets?
Yes, it is vegetarian, gluten-free, and vegan friendly.
- → How should the finished product be stored?
Store sealed jars in a cool, dark place; refrigerate after opening and consume within 4 weeks.