 Save to Pinterest
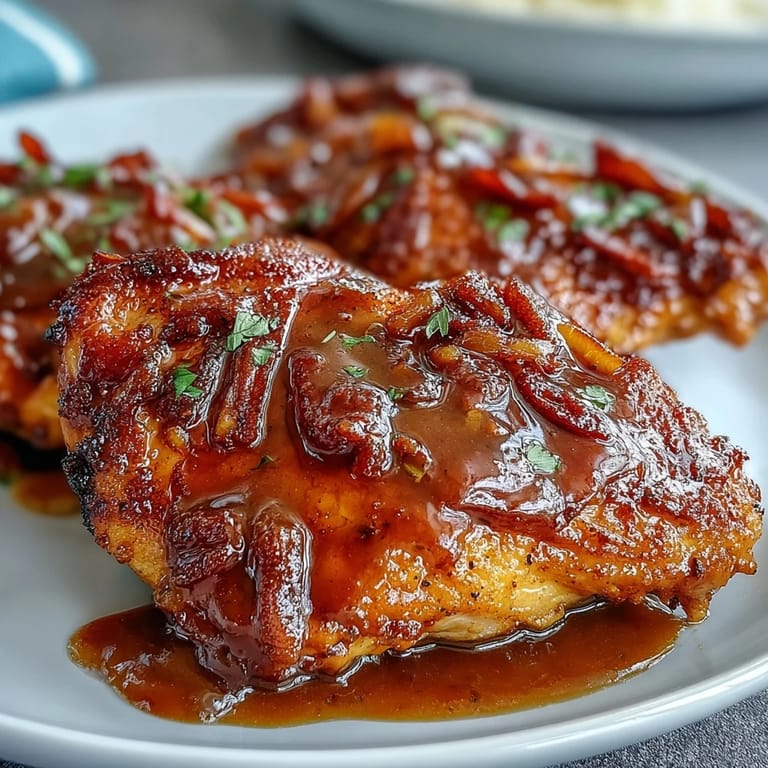
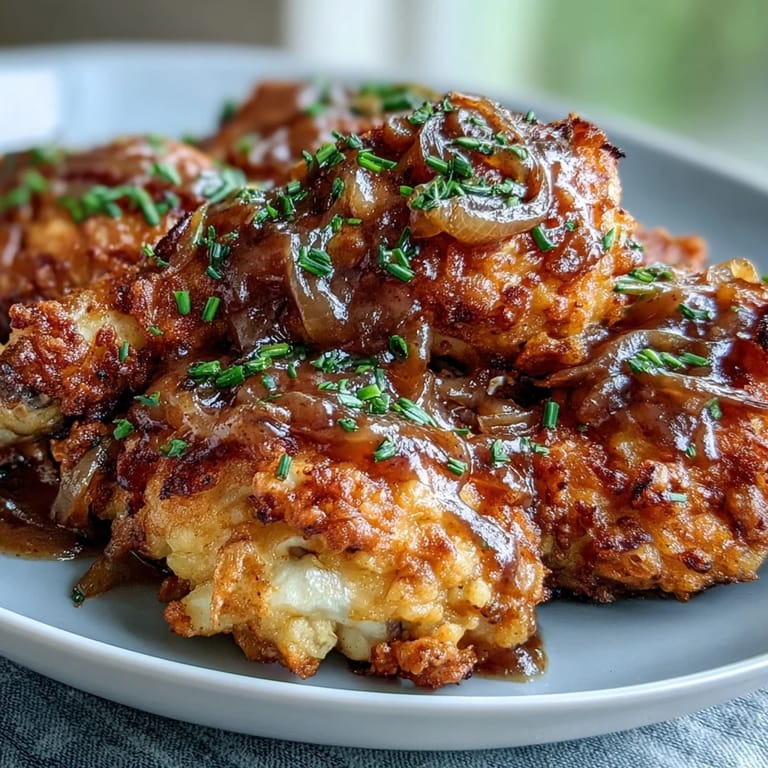
 My grandmother's kitchen had a particular smell on Sunday afternoons—the kind that made you linger in the doorway before she'd shoo you away to set the table. Smothered chicken was her answer to almost everything: bad days, good news, relatives dropping by unannounced. I'd watch her move through the steps with such ease that it took years before I realized there was actual technique hiding in what looked like casual cooking. When I finally made it myself, that first golden crust cracking under my fork brought back every reason she'd made this dish so often.
I served this to my partner's coworkers during a snowstorm when they got stuck at our place, and watching them quiet down mid-conversation to focus entirely on eating told me everything I needed to know. That's when I understood smothered chicken isn't fancy or trying to impress—it just shows up and does what it's supposed to do, which is somehow more powerful than any elaborate technique.
Ingredients
- Chicken thighs and drumsticks: Dark meat stays moist during the longer cooking time, and the bones add flavor to the gravy as everything simmers together.
- All-purpose flour for breading: Creates that signature golden crust that seals in the juices before the chicken finishes cooking in the gravy.
- Vegetable oil: High smoke point keeps the initial sear from becoming bitter, giving you that restaurant-quality browning.
- Large yellow onions: As they cook down, they turn silky and sweet, almost disappearing into the gravy while keeping it rich and full-bodied.
- Chicken broth and butter: These two transform the pan drippings and caramelized onions into a gravy that tastes like it's been simmering for hours.
- Dried thyme, paprika, garlic powder, and onion powder: This combination builds layers of flavor without overwhelming the dish—each one plays a quiet but important role.
Tired of Takeout? 🥡
Get 10 meals you can make faster than delivery arrives. Seriously.
One email. No spam. Unsubscribe anytime.
Instructions
- Dry and season your chicken:
- Pat the chicken completely dry with paper towels, then season generously on all sides—don't be shy with the spices because they're your first layer of flavor. This drying step is what separates golden skin from steamed, pale skin.
- Bread it light and shake it off:
- Mix flour with salt and pepper, then dredge each piece, shaking off the excess so you get a thin, even coating that crisps rather than clumps. Save that remaining flour because it becomes your thickening agent for the gravy.
- Fry until golden but not cooked through:
- Heat oil until it shimmers, then lay the chicken skin-side down and let it sit undisturbed for a good 6 minutes—that's how you get the crust to develop instead of sticking. You're looking for deep golden brown, but the chicken will finish cooking in the gravy, so don't worry if it feels a little underdone.
- Build the gravy base with onions:
- Leave about 2 tablespoons of oil in the pan and add your sliced onions, letting them cook slowly over medium heat while you stir occasionally. When they're soft and golden, about 10 minutes, they've released their sweetness and are ready to partner with the flour.
- Make a roux and cook it gently:
- Sprinkle the reserved flour over the onions and stir constantly for a minute or two, letting it toast slightly and lose the raw flour taste. This is a quick roux—you're not looking for deep color, just enough cooking to bind everything together smoothly.
- Whisk in the broth slowly and scrape the pan:
- Pour the broth in gradually while whisking, and use your spoon to scrape up all those caramelized bits stuck to the bottom—that's pure flavor. Add your thyme, paprika, salt, pepper, and butter, then let it simmer for a few minutes until it thickens to a consistency that clings to a spoon.
- Nestle the chicken back in and finish gently:
- Arrange the chicken pieces in the gravy, spoon some of the sauce over the top, then cover and drop the heat to low. The 25 to 30 minutes of gentle simmering is when the chicken finishes cooking and gets infused with all that savory onion flavor.
- Finish with a taste and a spoon:
- Check that the chicken is tender and reaches 165°F at the thickest part, then season the gravy one more time if needed. Serve it while it's hot, making sure each plate gets plenty of that poured-over gravy.
 Save to Pinterest
 There was a moment during the simmering when my kitchen filled with such a specific, unmistakable smell that I could have been standing in my grandmother's kitchen thirty years ago. That's when I realized this dish is less about technique and more about showing up with care—the kind of cooking that says 'I'm taking time for you' without needing to say much at all.
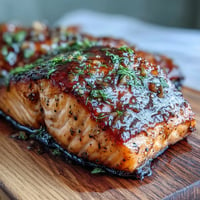
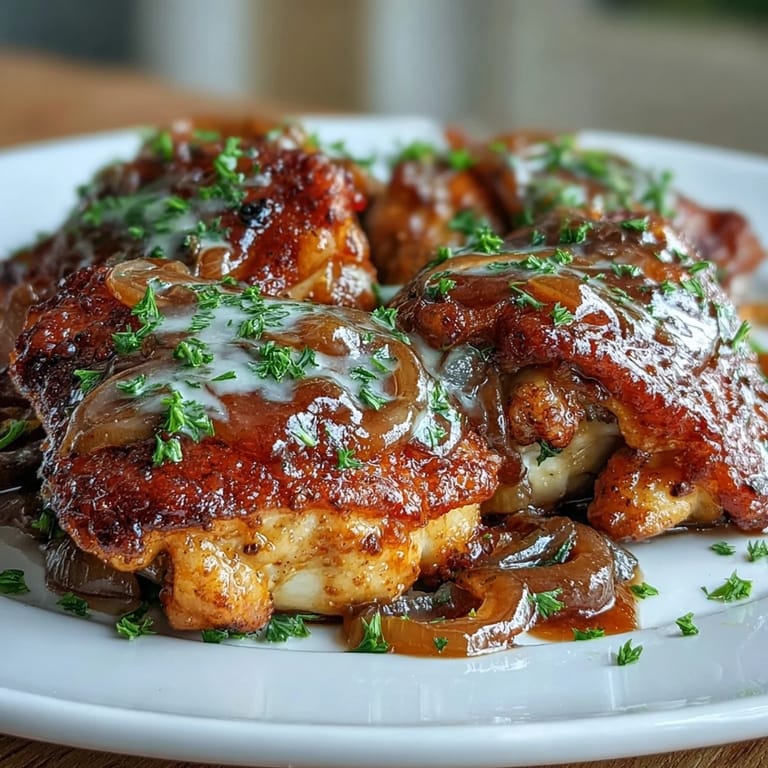
Why the Bone-In, Skin-On Pieces Matter
Boneless, skinless chicken would cook faster and shred easier, but you'd lose something essential in the trade—the bones add subtle, savory depth to the gravy as it simmers, and that skin gets impossibly crispy in the initial frying. If you're short on time, boneless pieces will work, just reduce the final simmering to 15 minutes. But if you can find the time, the difference between good and genuinely memorable comes down to those bones and that skin.
The Onion Gravy is Everything
This isn't a thin sauce poured on top—it's a partnership where the onions soften into the gravy and the chicken finishes cooking in it, so all the flavors become one. The butter at the end rounds everything out and gives the gravy a shine that makes it cling to the chicken and whatever you serve underneath it. Homemade broth makes a difference here if you have it, but even with store-bought, low-sodium lets you season to your taste without ending up too salty.
What to Serve Alongside
Mashed potatoes are the classic choice because they're soft enough to soak up the gravy without competing for attention, and rice works equally well if you prefer something lighter. Collard greens or buttered corn add a welcome contrast of texture and a slight brightness that balances the richness. This is the kind of meal that doesn't need much else—maybe a simple green salad, maybe just bread to wipe the plate clean.
- Make the mashed potatoes while the chicken simmers so everything finishes at the same time.
- Don't pour the gravy until you're plating, or it'll soak into the potatoes and they'll get heavy.
- Leftovers taste even better the next day, and reheating gently on the stovetop keeps the chicken from drying out.
 Save to Pinterest
 This dish asks so little of you—just patience and a willingness to let the pan do the work—and gives back something that tastes like it comes from somewhere deeper than a recipe. Make it once and you'll understand why it's been a staple on Southern tables for generations.
Recipe FAQs
- → How do I ensure the chicken stays tender?
Cooking the chicken slowly in the onion gravy on low heat allows it to absorb flavors and stay moist and tender.
- → Can I use boneless chicken pieces?
Yes, boneless chicken thighs or breasts can be used but reduce simmering time by about 10 minutes to avoid overcooking.
- → What gives the gravy its rich flavor?
The combination of sautéed onions, butter, broth, and spices like paprika and thyme creates the savory, smooth gravy.
- → What sides pair best with this dish?
Traditional Southern sides like mashed potatoes, rice, or collard greens complement the rich flavors perfectly.
- → Is the flour used for breading or thickening?
The flour is used both for coating the chicken before frying and for thickening the onion gravy, providing a nice texture.